Short
TL;DR
Hiddify Next is a sing-box-based client that natively speaks Hysteria 2, VLESS Reality, xHTTP, and AmneziaWG. Drop a Lunaire subscription into it and your phone or laptop is in a tunnel within 30 seconds. Below are step-by-step instructions for iOS, Android, Windows, and macOS, with a screenshot for every screen. No subscription yet? Lunaire's free DUSK plan (1 GB/day) is issued by the bot with no signup or payment.
Context
What Hiddify is and why pick it
Hiddify Next is an open-source VPN client built around sing-box. It's one of the two clients we recommend for Lunaire (the other is Happ on iOS). Why: native support for all four modern protocols (Hysteria 2, VLESS Reality, xHTTP packet-up, AmneziaWG), automatic outbound selection, load-balancing across nodes, kill switch, per-app split tunneling, and clear logs for diagnostics.
The legacy Hiddify (FragmentVPN) on the V2Ray engine is deprecated and lacks Hysteria 2 and Reality support. Everywhere below means Hiddify Next.
Step 1
Get a Lunaire subscription from the Telegram bot
A subscription is a long URL like https://api.lunaire.app/v1/sub/... with all protocols and nodes baked in. Hiddify imports it and assembles a working config from there.
Open @lunairevpn_bot in Telegram and hit /start. You'll see the main menu.
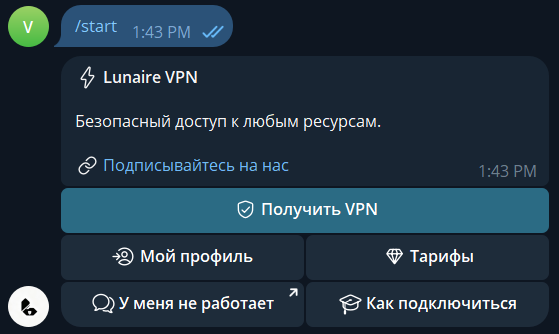
Tap «Получить VPN» (Get VPN). The bot asks which device you'll use — this picks the right client recommendation.
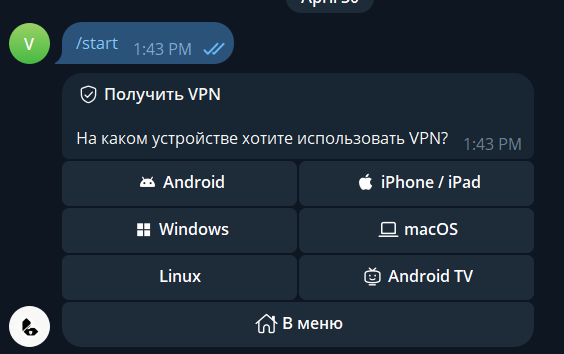
Pick your platform. Next screen offers two clients — Happ or Hiddify. For this guide pick Hiddify.
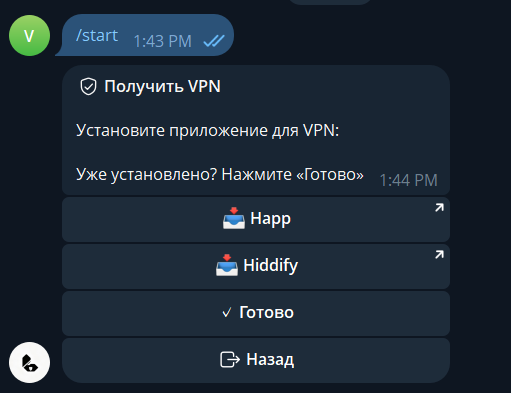
Install the app, come back, hit «Готово» (Done). The bot drops the subscription URL with three useful buttons.
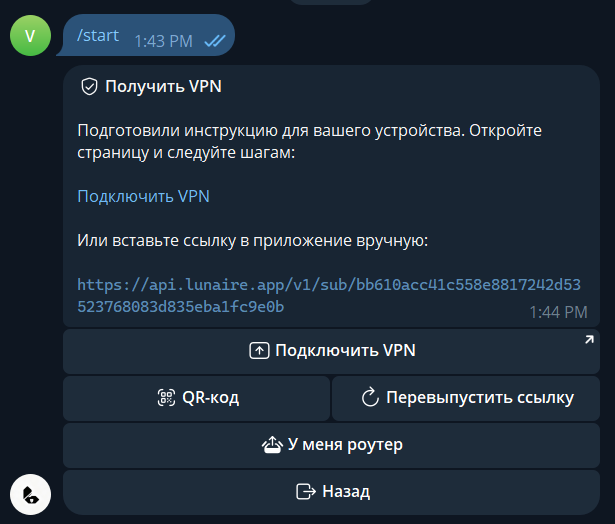
Three ways to import the subscription, by convenience:
- «Подключить VPN» button (Connect VPN) — fastest. Tap it inside Telegram, the OS opens Hiddify and adds the profile automatically. Works on iOS and Android if Hiddify is installed.
- Copy and paste via clipboard. Long-press the message with the URL → Copy. In Hiddify hit Clipboard — it picks it up.
- QR code. The «QR-код» button shows a QR image. Scan it from a second phone via «Сканировать» (Scan) in Hiddify.
The «Перевыпустить ссылку» (Reissue Link) button is for the case when endpoints feel stale or the link leaked: it issues a fresh URL with new keys, the old one stops working.
Step 2
Install Hiddify Next on your platform
iOS / iPadOS
Open the App Store, search for Hiddify Proxy & VPN — publisher Holistic Resilience. Icon: stylized blue bars and the letters Hi.
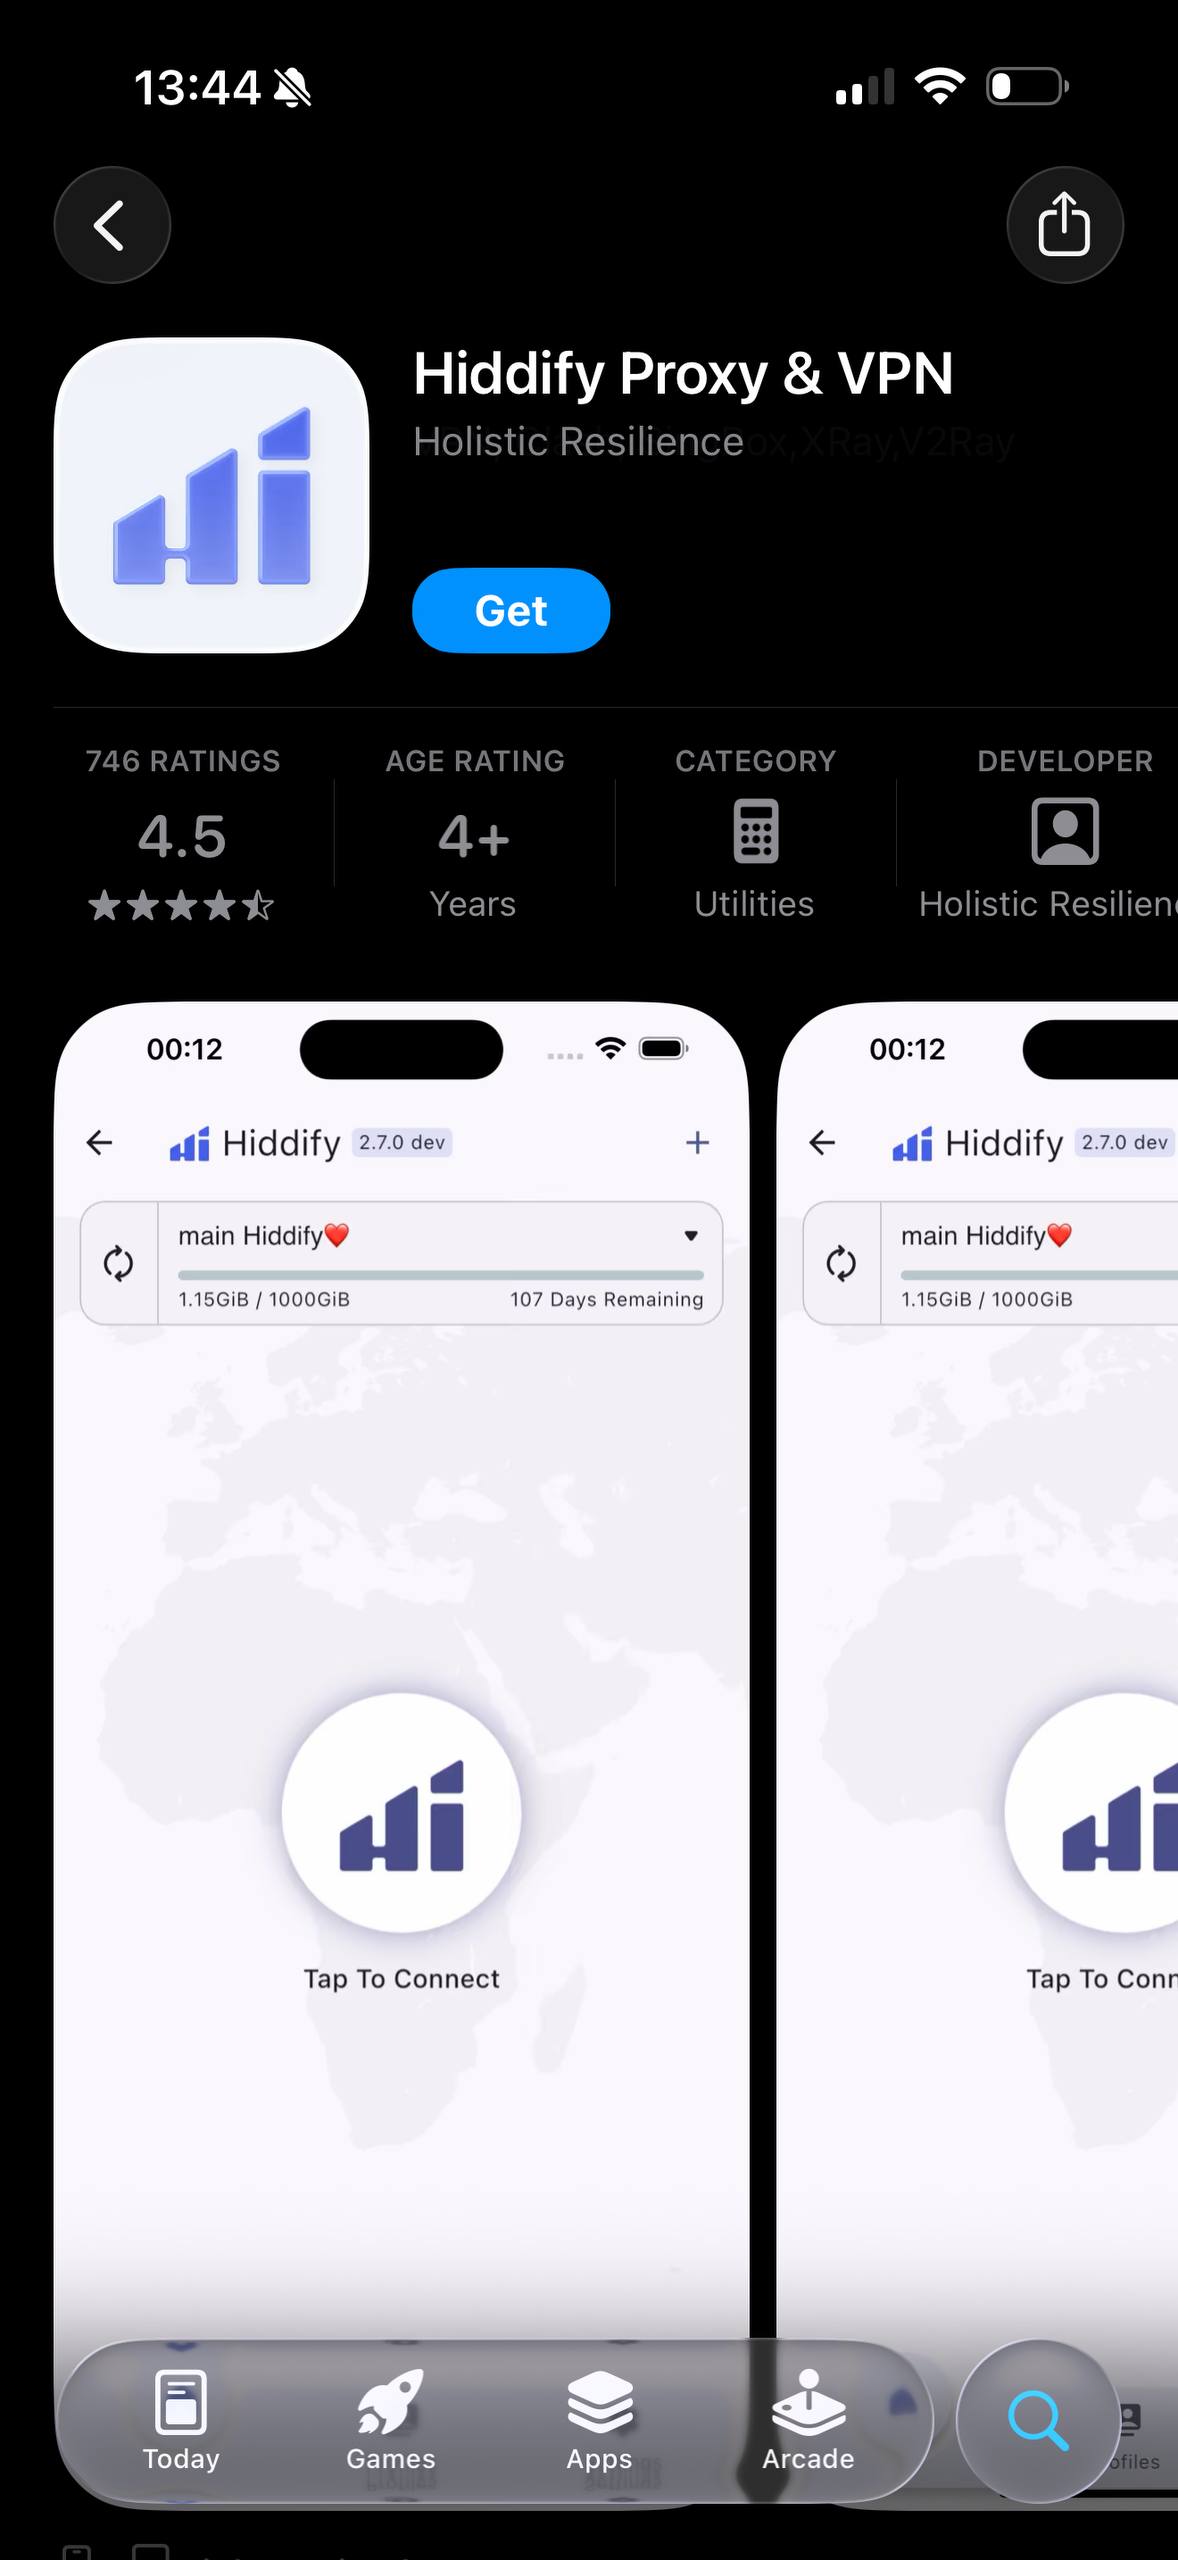
Hit Get, wait, open. On first launch iOS asks to allow VPN configurations — accept; without it the tunnel won't come up.
Android
Open Google Play, search Hiddify by UnboundTechCo. Version 4.x or newer is Hiddify Next.
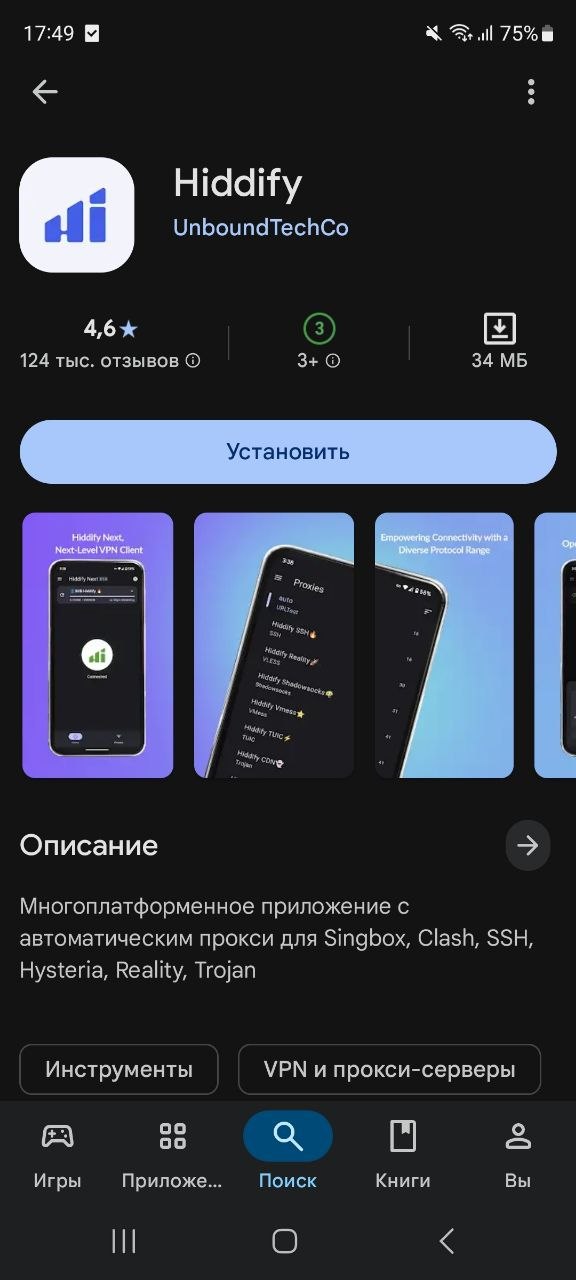
If Google Play in your region is unavailable or has the wrong version, get the APK directly from GitHub: github.com/hiddify/hiddify-next/releases. The .apk installs through the system installer. On first launch Android prompts for VPN install permission — grant it.
Windows
Grab the installer from GitHub: github.com/hiddify/hiddify-next/releases. The file is Hiddify-Windows-Setup-x64.exe. Run it, click Next twice, done. On first launch Windows asks for admin rights to create a tun interface — allow it.
macOS
On the GitHub releases page get Hiddify-MacOS.dmg (Apple Silicon) or the matching x64 build. Open the .dmg, drag Hiddify into Applications. On first launch macOS asks for permission in System Settings → Network to install a VPN configuration — confirm.
Linux
Both .AppImage (universal) and .deb (Ubuntu/Debian) are available on the same GitHub release. Make AppImage executable (chmod +x) and run.
Step 3
Import the Lunaire subscription
Below — import on every platform with screenshots. If you've already copied the URL from the bot, jump to your section.
iPhone and iPad
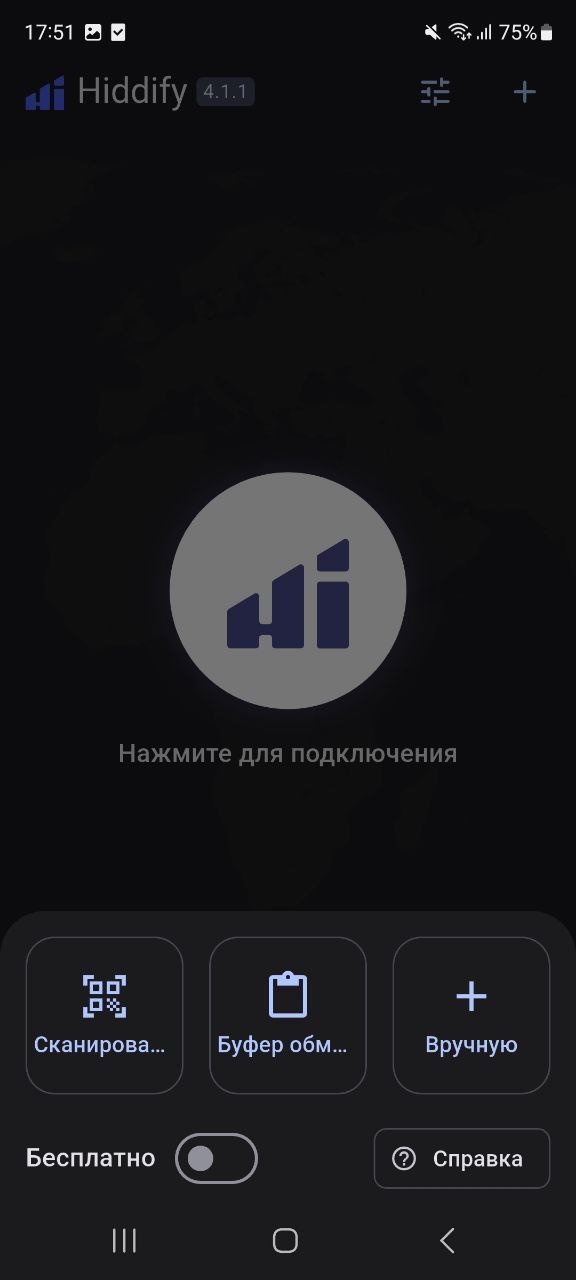
After launching Hiddify Next the home screen shows a single icon and the label «Нажмите для подключения» (Tap to connect). Nothing to connect to yet — no profile.

Tap «+» top right. A panel slides up with three options: «Сканировать» (Scan), «Буфер обмена» (Clipboard), «Вручную» (Manual). There's also a «Бесплатно» (Free) toggle — those are public free profiles from the Hiddify project, unrelated to the Lunaire subscription. Leave it off.
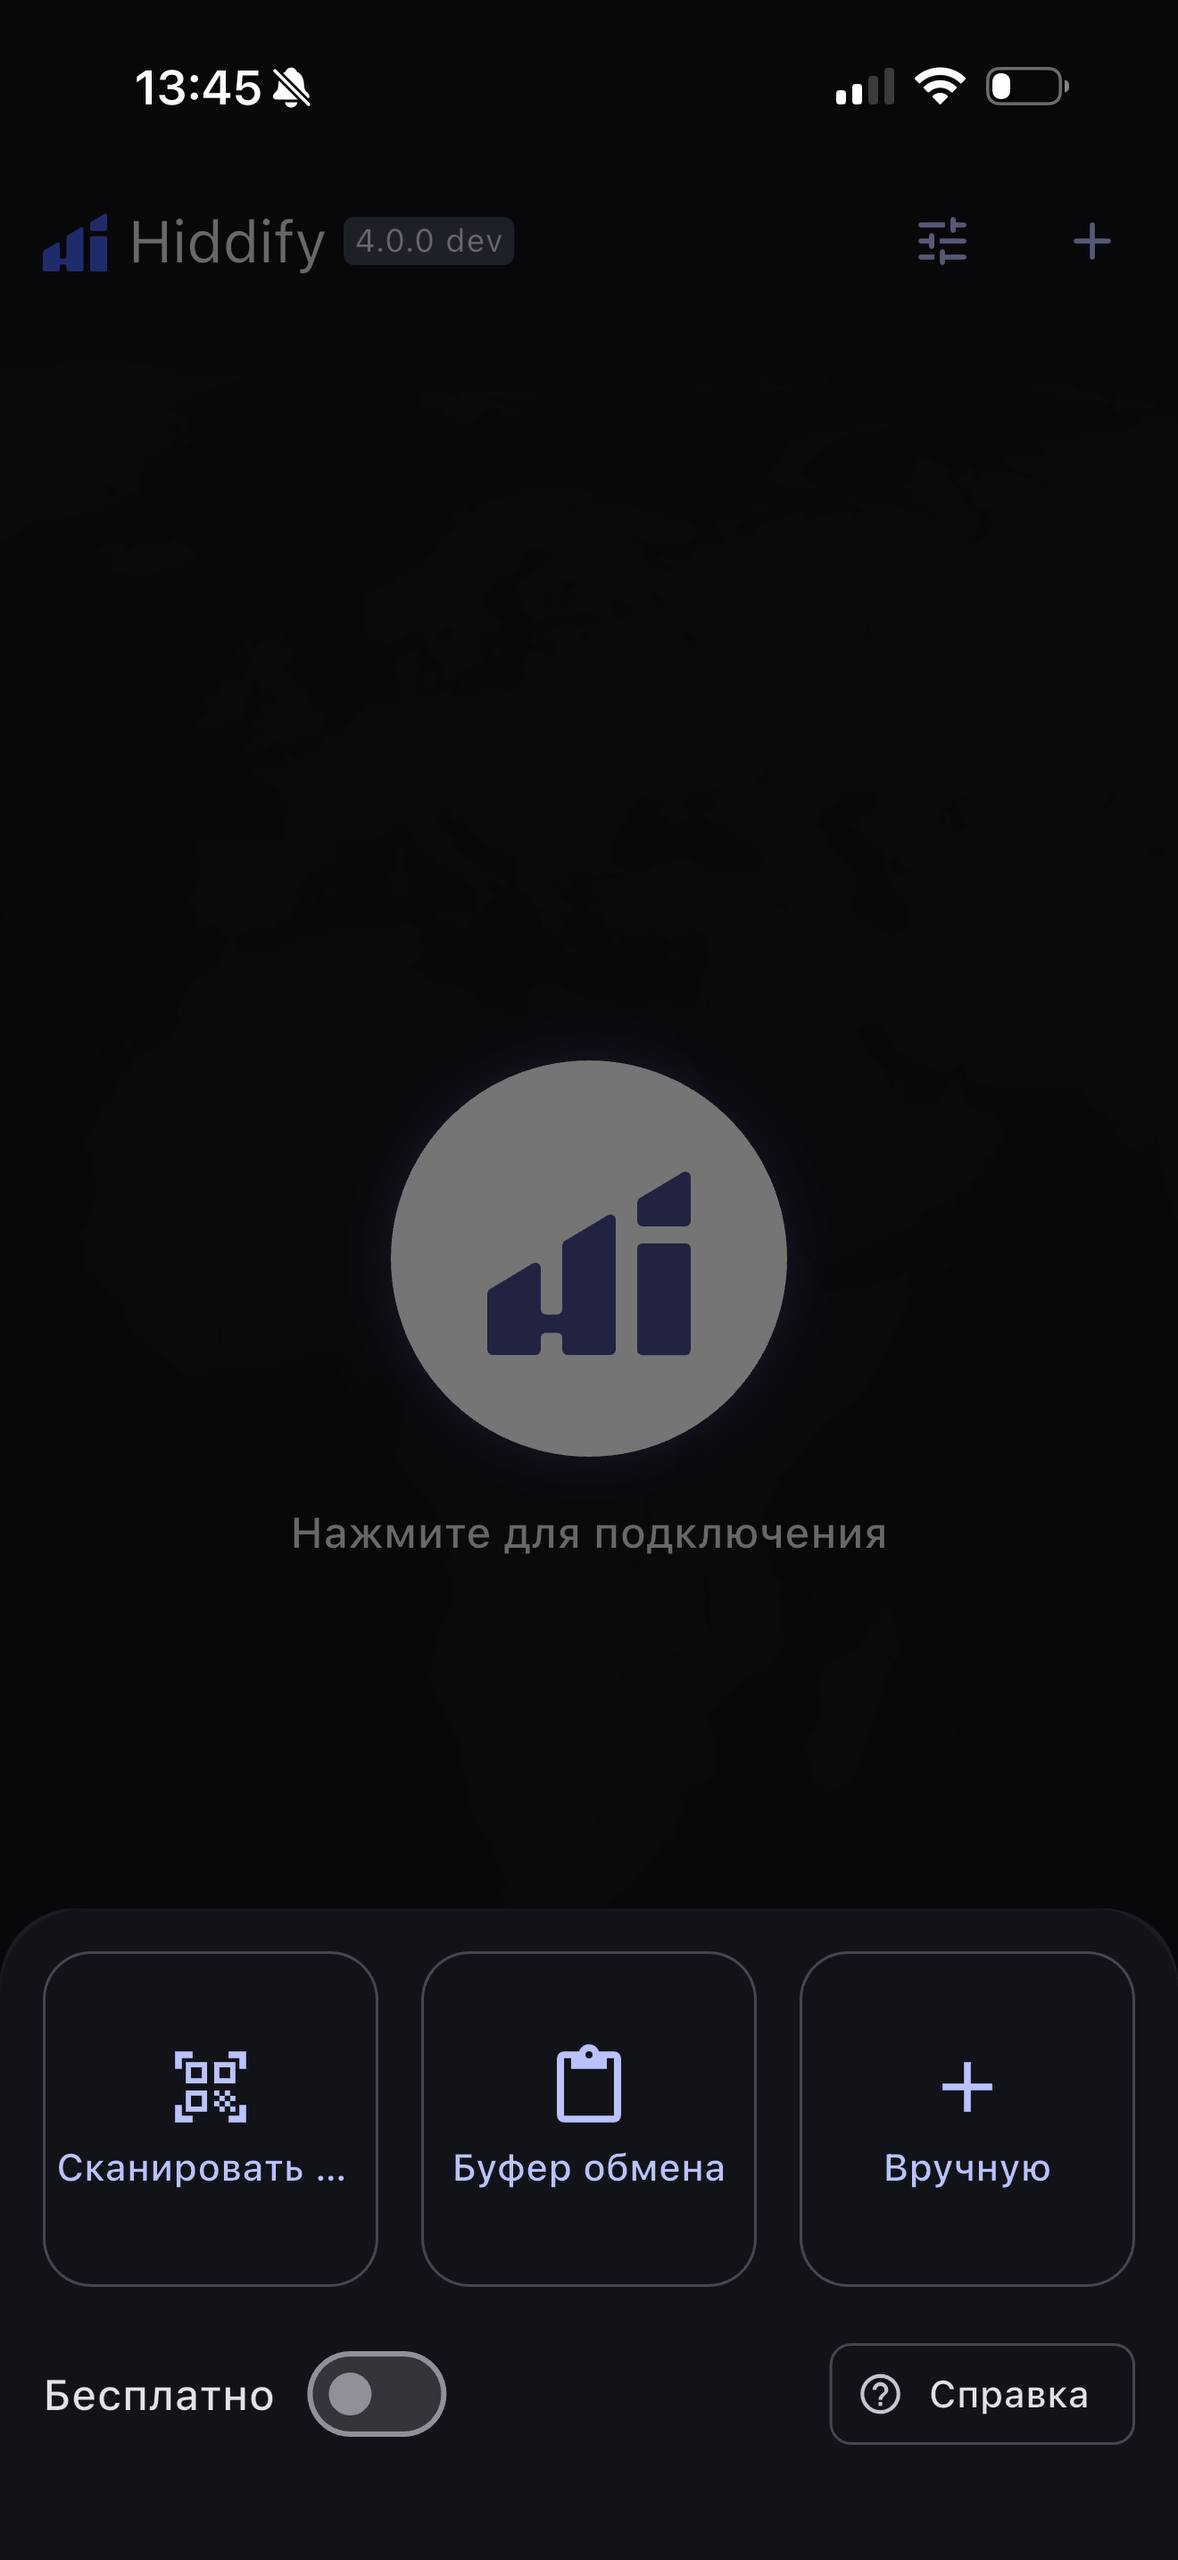
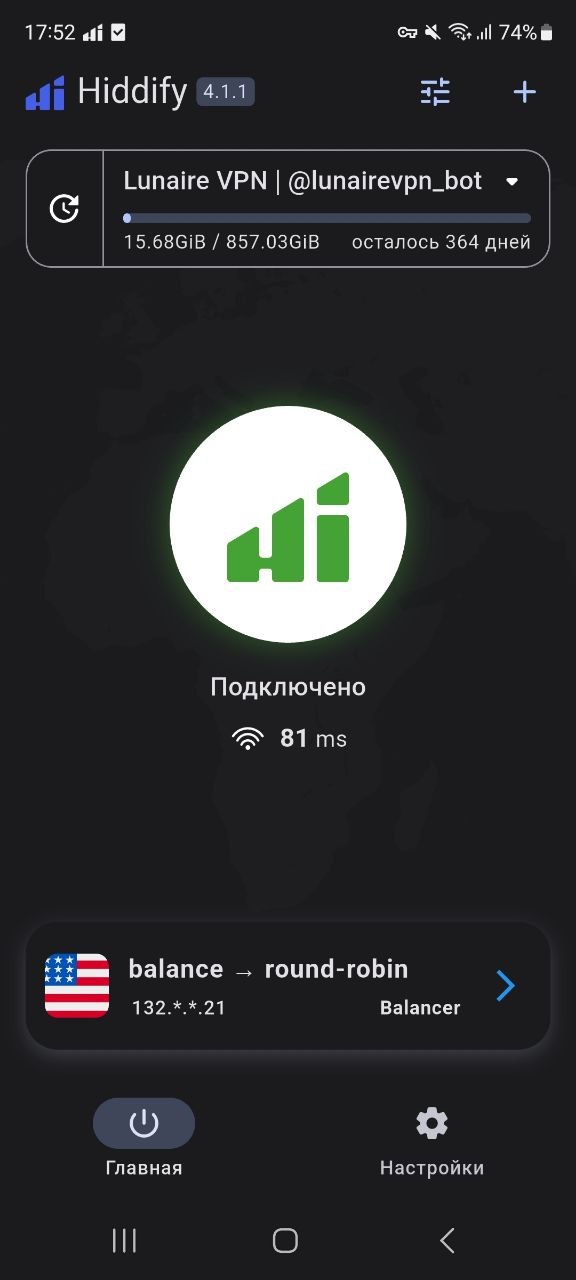
Fastest path is Clipboard. Switch to Telegram, long-press the subscription message → Copy, return to Hiddify, hit Clipboard. The profile shows up as Lunaire VPN | @lunairevpn_bot with a quota progress bar.
Alternative — the «Подключить VPN» (Connect VPN) button straight in the bot. Tap it, iOS opens Hiddify and auto-imports.
Hit the big round button. iOS asks for VPN config permission once (Touch ID / Face ID), confirm. The icon goes green, you see «Подключено» (Connected) and the current ping.

At the bottom — current exit server. In the screenshot a Germany node (151.*.*.82) via balance → round-robin. That's the normal mode: Lunaire spreads connections across regional nodes, and on degradation traffic moves to a sibling without dropping.
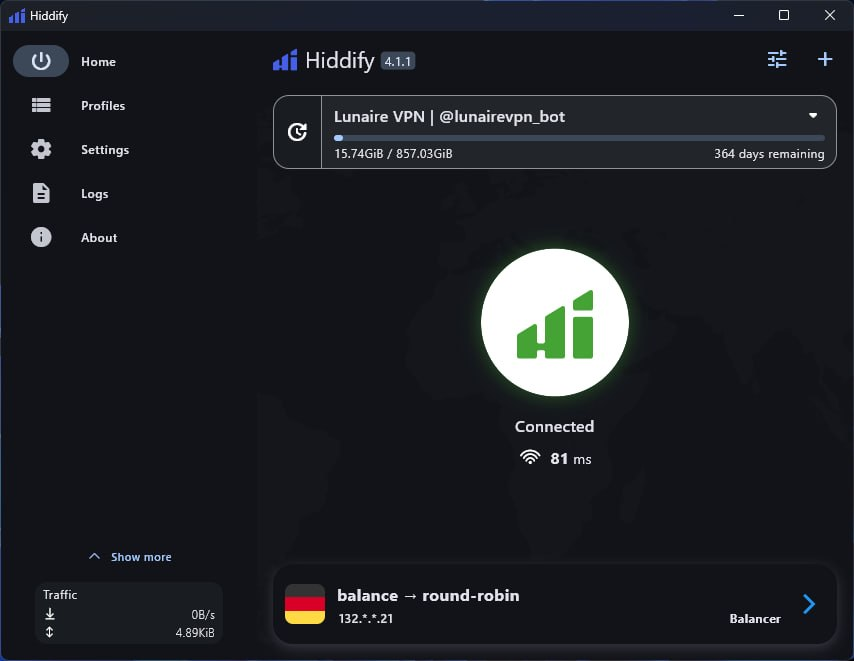
Android
After install Hiddify Android shows the same empty home screen — icon in the middle, «Нажмите для подключения», version 4.1.1 or newer.
Tap «+» top right. Same panel as iOS: Scan, Clipboard, Manual, plus the free-profiles toggle (leave it off).
Copy the URL from the bot (long-press → Copy), back in Hiddify hit Clipboard. The Lunaire profile lands in the list.
Hit the big round button. Android asks "Hiddify wants to connect as a VPN" — accept. The icon goes green, «Подключено», ping and current exit IP.
Screenshot — US node (132.*.*.21), 81 ms. On EU nodes you'll see 40-80 ms from RU/CIS. To pick a specific region tap the server block and choose manually.
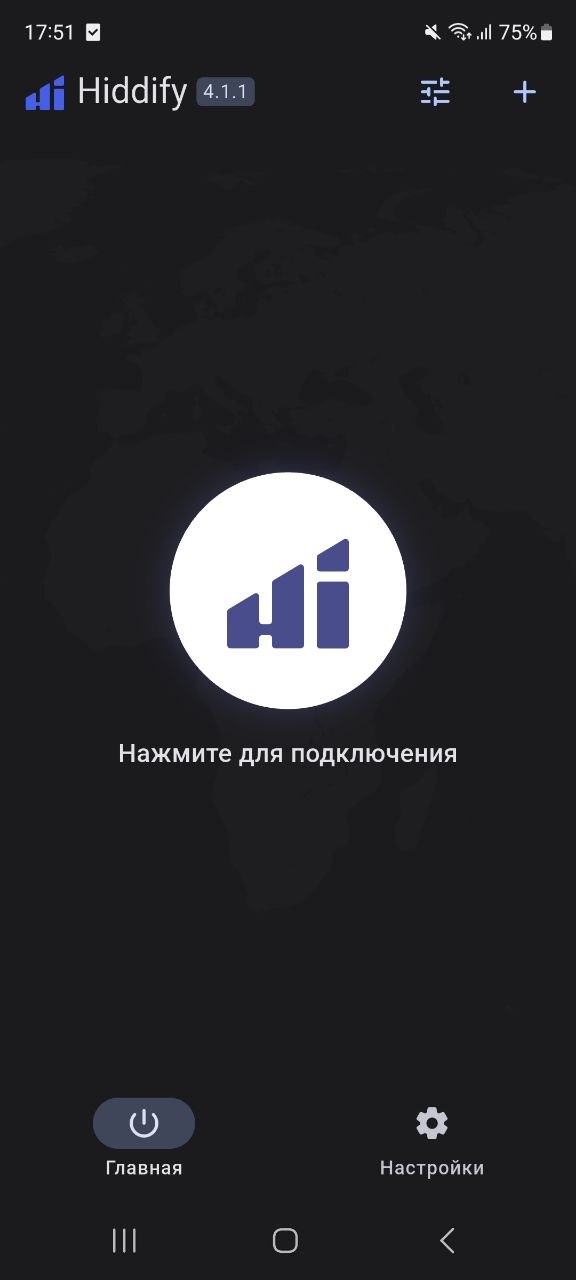
Windows
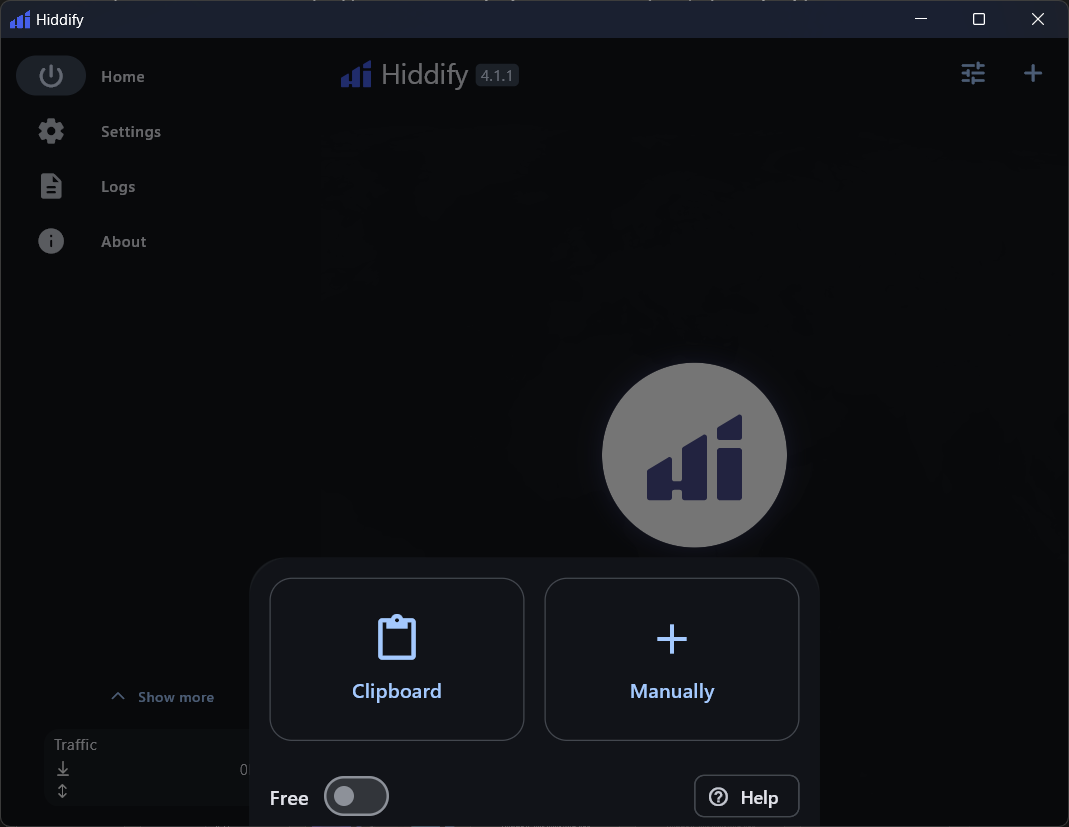
After install the main window shows: side menu (Home / Settings / Logs / About), big icon with Tap to connect, traffic indicator at the bottom.

Hit «+» top right. On desktop only two options: Clipboard and Manually. No QR scanner on desktop.
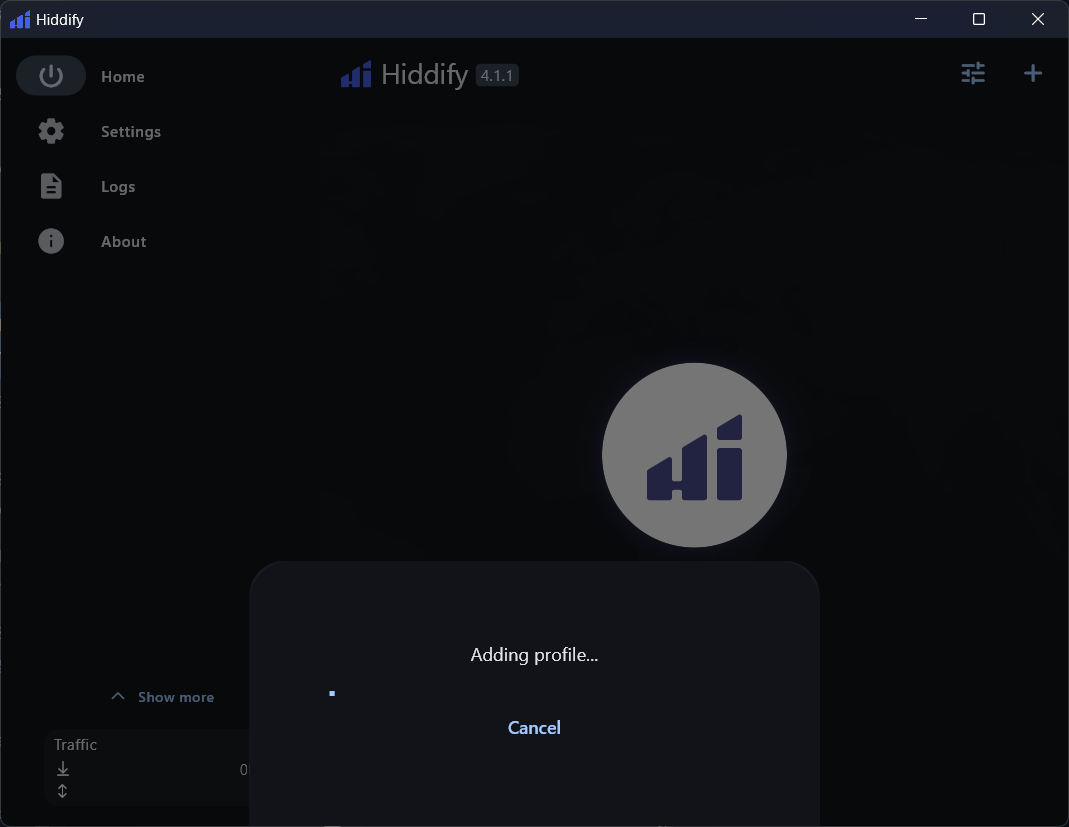
Easiest — copy the subscription URL from Telegram Desktop (or Telegram Web in a browser) and hit Clipboard. A short Adding profile… dialog appears — the client downloads and parses the subscription.
After a couple seconds the dialog closes and a profile row Lunaire VPN | @lunairevpn_bot appears at the top with a quota bar. Hit the big round button — Hiddify asks for admin rights to create the tun interface (one-time), then connects. Icon turns green, label Connected, ping shown.
Picked Manually instead? Paste the same URL into the URL field; the profile name can be anything.
macOS
Same as Windows: open Hiddify, hit «+» → Clipboard, copy the URL from Telegram first. On the first connect macOS asks for an admin password (to install the system VPN configuration) — once.
Servers
The balancer and which server to pick
A Lunaire subscription defaults to a balance → round-robin balancer. Hiddify doesn't pin you to one node — it spreads connections across several servers in a region. Upside: if a node degrades or hits a targeted filter, traffic moves to a sibling automatically — no drop.
Need a specific country? Tap the balancer block (a card under the main button on mobile, lower on desktop). Pick a region from the list. Useful when geo matters — banks or streaming bound to a country.
Settings
Fine-tuning
Pick a protocol manually
By default Hiddify is in Auto — recommended. Override only when:
- Hysteria 2 — pick if your network has noticeable packet loss (mobile, café Wi-Fi) and you want max throughput.
- VLESS Reality — pick if UDP is filtered and Hysteria can't come up.
- xHTTP packet-up — for the toughest networks with behavioral analysis (some corporate firewalls, ML-based filters).
Settings → Outbound mode → Manual → pick from the list.
Kill switch
Settings → Tun → Block connections without VPN. With it on, if the tunnel drops, all traffic is blocked until it's back — never leaks to the open internet. On Android use Always-on VPN in system settings (not in Hiddify).
Per-app proxy / Split tunneling
Settings → Per-app Proxy Mode. Pick which apps go through VPN and which stay direct. Useful for banking apps that geo-block and for local-only services. Available on Android and Windows; not on iOS (system limitation).
DNS
Settings → DNS. Default is DoH on Cloudflare. If your network blocks DoH, switch to tls://1.1.1.1 (DoT) or to the DNS server embedded in the subscription config.
Troubleshooting
Doesn't work? What to check
Icon won't go green or it connects but no internet — first thing, open Logs in the side menu. The actual reason is almost always there.
-
connection refusedori/o timeout— your provider is dropping a specific protocol. Switch Outbound mode to Auto, Hiddify picks a working one. Already on Auto and still failing? Hit «Перевыпустить ссылку» (Reissue Link) in the bot — you get fresh endpoints. - Connected but sites don't open — almost always DNS. Settings → DNS → switch DoH resolver. Also check your antivirus or ISP "safe DNS" isn't active — they collide with VPNs.
-
permission deniedon Android — the app lost its VPN permission. Go to system Settings → Apps → Hiddify → Permissions, re-enable. - iOS connection hangs forever — delete the profile in iOS system settings (Settings → General → VPN & Device Management → Hiddify → delete), reinstall the app, re-import the subscription. iOS sometimes caches a broken VPN profile at OS level.
- Windows: no internet after connect — tun interface conflict with another VPN client. Close OpenVPN/WireGuard/corporate VPN, restart Hiddify. Last resort — Settings → Tun → switch to system proxy mode; it doesn't create a tun interface and works at system-proxy level.
Lunaire
Why Lunaire is a working subscription for Hiddify
Hiddify is the engine. The subscription is the fuel. Tunnel quality is decided by what the subscription brings in, not by the client itself.
- All four protocols in one subscription. Hysteria 2, VLESS Reality, xHTTP packet-up, AmneziaWG. Hiddify in Auto switches between them on its own — no manual juggling.
- Balancer and failover. Round-robin across regional nodes; on degradation traffic moves to a sibling without a drop.
- Free DUSK 1 GB/day forever. Verify on your network before paying — no card, no signup.
- No-logs architecture. Subscription secrets in DB AES-256-GCM-encrypted, request history not kept.
- Fresh European nodes. 40-80 ms ping from RU/CIS to Amsterdam/Frankfurt — the difference between "normal internet" and "everything lags".
Takeaway
Takeaway
Hiddify Next + Lunaire — a 5-minute setup that gets you a working tunnel with auto-protocol-switch and load balancing. No manual configs, no key/port juggling: bot drops a URL, client picks it up, button pressed, you're in.